A good solder iron is important to solder SMD or other small components.
For a limited budget (<30 €) there are only two options: a cheap Chinese solder iron or a no-temperature-control iron.
We had a Yihua (Hakko’s copy) iron at the robotic club. But after being left hot for few hours, most of the plastic handle was melted down.
After reading some articles on the web I decided to create my own version of a soldering iron based on the Weller tip RT1. For people which are not familiars with Weller Iron, these are (usually) good quality and reliable with fine tuning of their regulation system. Thus, the problem come from the price. The soldering tip cost around 20 bucks while the full station is around 300€. My plan was to get a working solution as cheap as possible.
So based on the tip RT1, I decided to recreate the temperature control with a basic arduino pro mini (~2.5€) and few components off the shelf.
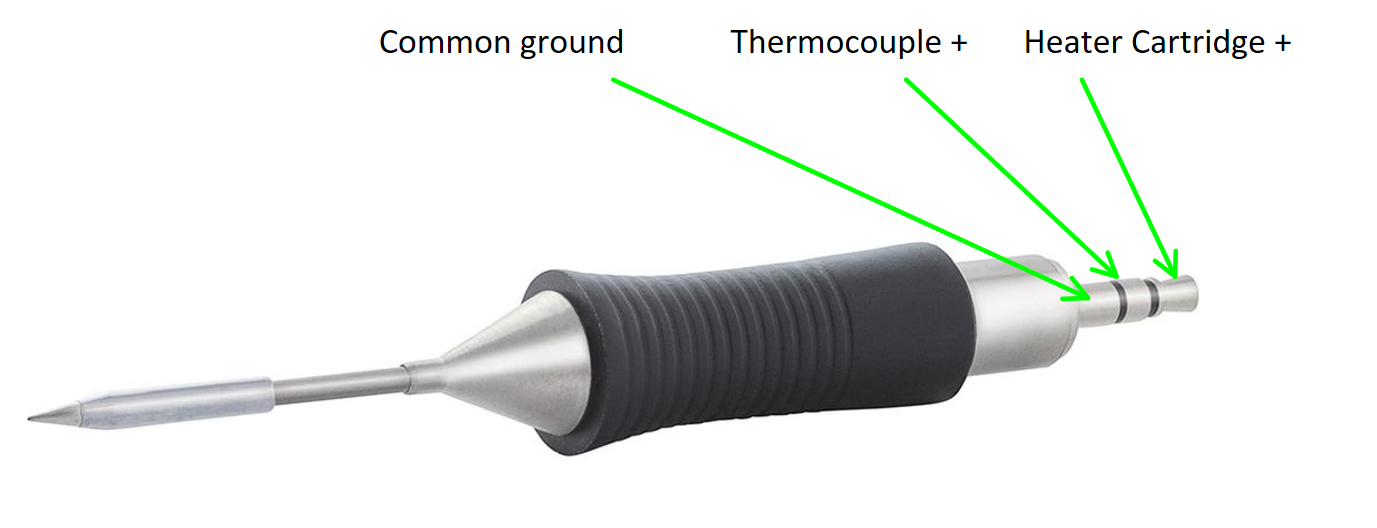
As the heater cartridge and the thermocouple share a common ground, some precautions should be taken reading the thermocouple signal.
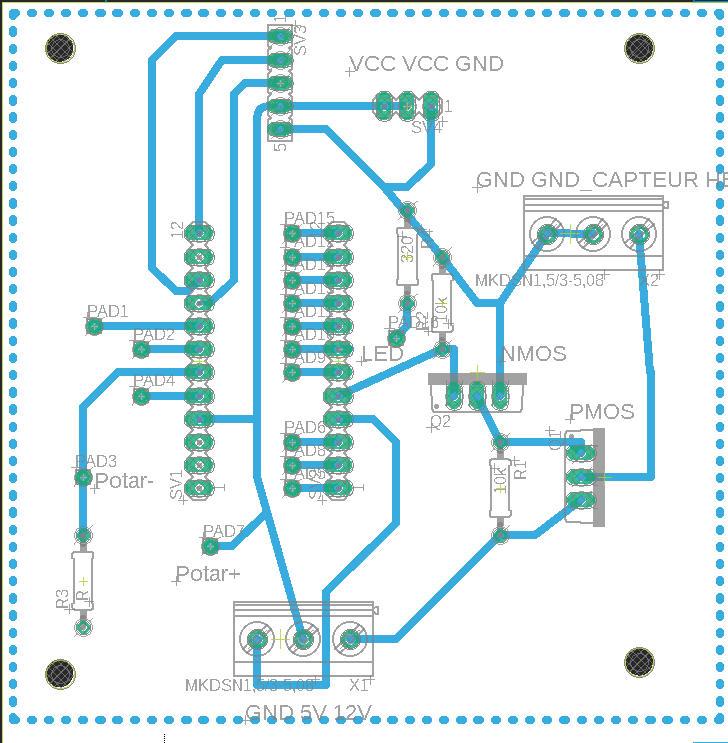
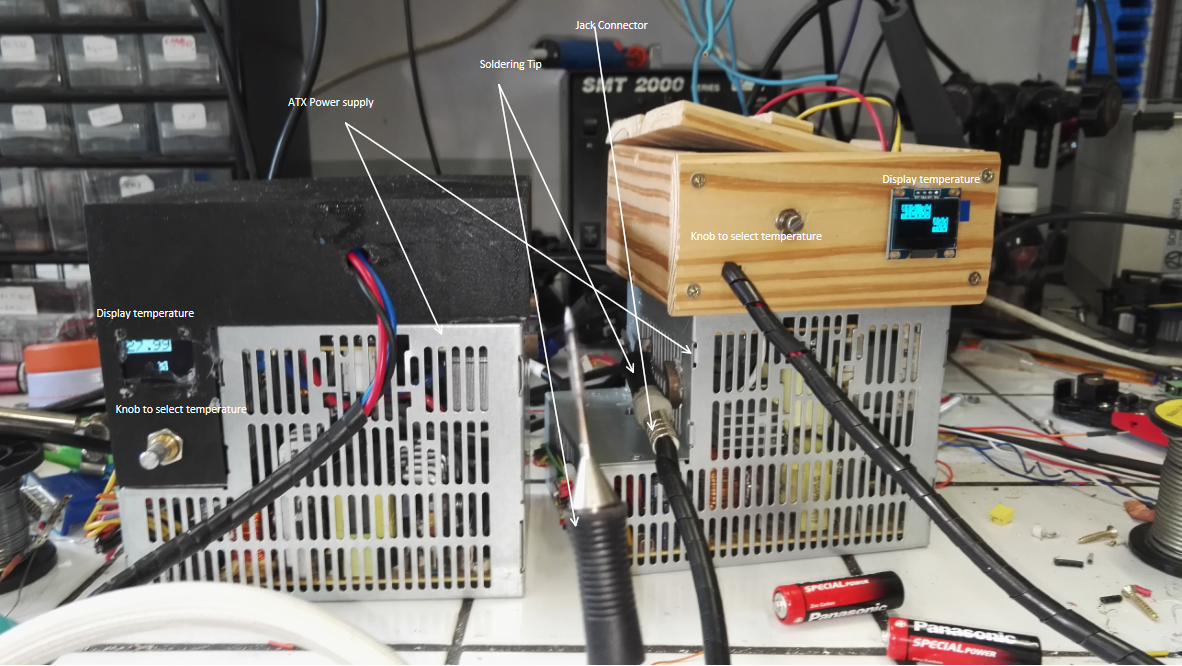
Adding a Jack 3.5mm connector (0.5€), few wires, a thermocouple reader MAX6675 which output the value through SPI (1.5€), OLED screen and few components from the shelf (potentiometer, NMOS, PMOS and resistors), I was able to drive it. After doing a homemade one face PCB thanks to our toner printer and some hydrogen peroxide, I picked an ATX power supply from an old desktop PC (overkill but free for my case).
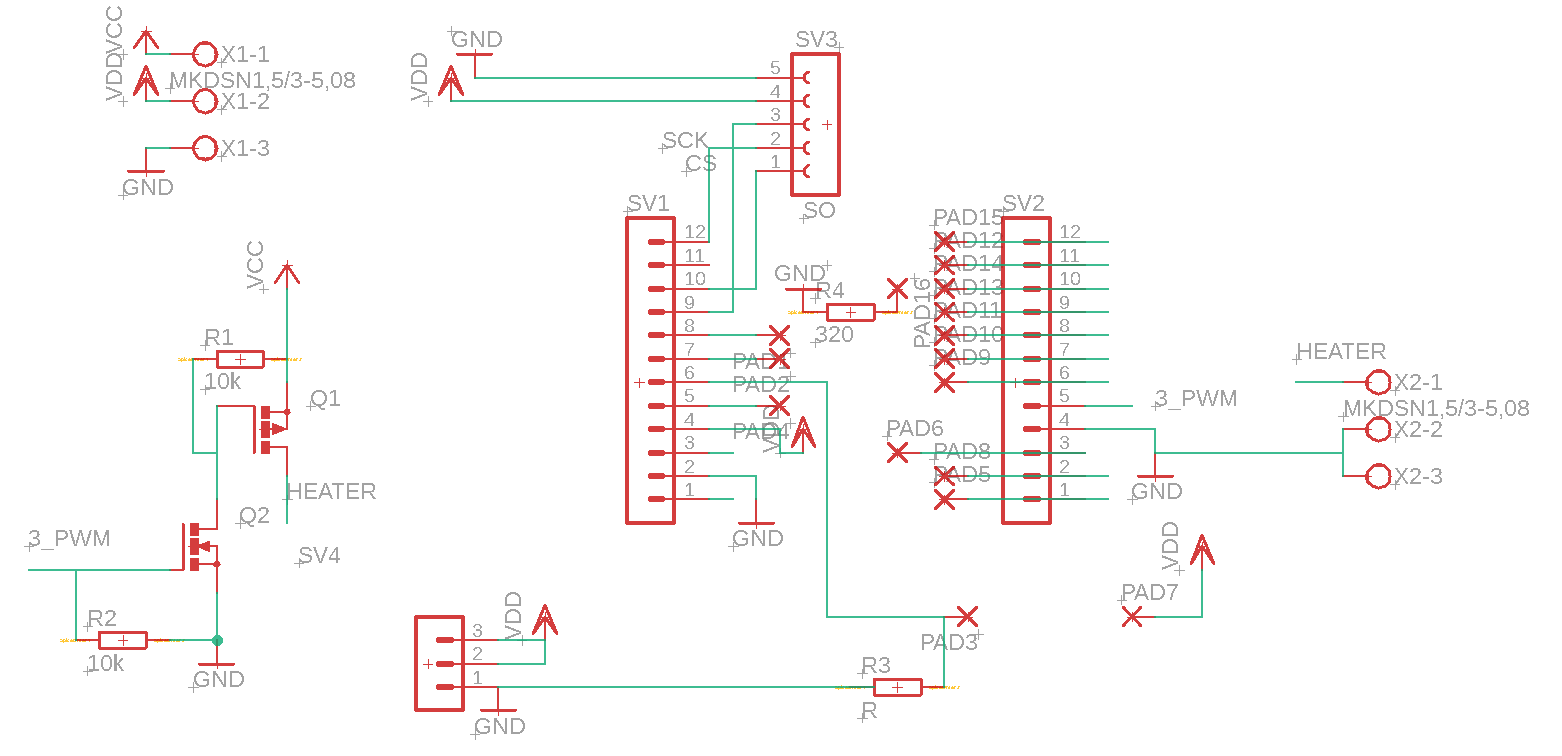
SV1 and SV2 are the header for the arduino pro Mini
The NMOS has a V_threshold around 2.5V, it is then suitable to drive it with a 3.3V microcontroller. The only capable PMOS I could find on my shelf was a 12V PMOS.
So the NMOS will transpose the 5V command from the uController into a 12V signal to drive the PMOS.
The value of the potentiometer is read by the arduino pro mini thanks to the integrated ADC.
The resistor R3 rescale the 0-5V output of the potentiometer (as it is connected to 5V and gnd) to a 0-3.3V range for the arduino’s input.

From there, my friend Sylvain copied the design to build a wooden version of my 3D printed enclosure.
The software was easy, no fancy PID or fuzzy control as being accurate wasn’t important for me (as long as you are not overshooting too much), and was based on a simple finite state machine :
- Stop heating, read the actual temperature (it is important to stop heating while we read as the signals share a common ground)
- If actual temperature < temperature required by the position of the potentiometer then heat(Switch the state of the NMOS), otherwise don’t
- Repeat
The result is really good, the tip is going from 25°C to 350°C in less than 7 seconds and hold its temperature even against big copper plane (the system can use up to 70W to work at full power). The temperature control does overshoot of ~10°C due to the simplistic regulation implemented but I don’t need to achieve better stability so it is perfectly fine.
All files and sources can be find here :
I would recommend that solution to anyone who want a thin, but powerful, solder tip and has a bit of time and few components left in a box. The iron is now working since 2 years without any problem.
A good improvement would be a better handle, maybe buying the official one, but keep the custom electronics.
Poster un Commentaire